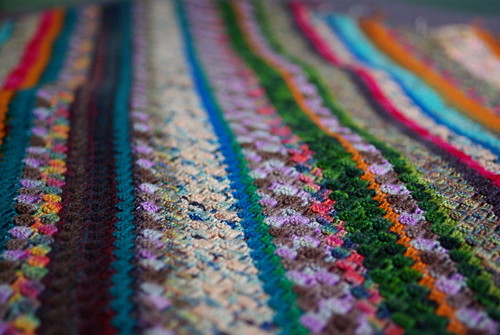
It all started when I saw a picture of a blanket with a mesmerizing texture. I loved it but the pattern wasn't available and there was no mention of the stitch. What followed was a TON of fruitless googling. As a former (professional) researcher I don't take it too well when I can't find something. Ego bruised, I decided it didn't matter, I could figure it out myself and so I did. Off I went, devised my own version of the stitch and posted a picture on Flickr of my early progress. At which point the lovely and talented Oiyi put an end to the mystery: Diagonal Box Stitch. (Interwebs FTW!).

So rather than torturing you all with my haphazard directions, I can point you to this handy tutorial from Crochet Cabana. Interested in exactly what I did? Read on.
For this throw I'm using fingerling scraps (supplemented by full skeins) and an E (3.5 mm) hook.
Gauge is key to this stitch, your individual boxes must be square so experiment til you find what works for your yarn. Mine was roughly 2 boxes per inch.
I worked DBS as in the tutorial except:
- I did 3 treble crochet (TC) per box, not double crochet
- My foundation chains were 5 sts, not 6
- When I turned I made the 1st TC in the 3rd st from the hook, not the 4th
Row 91: Worked in the same manner as before but at the end of the row, when there is only one box from the previous row left to work into, join with a slip stitch AND TURN (skip making a new box along the edge of that last box from the previous row - This isn't so much a decrease but a skipping of an increase).
Row 92: Slip stitch across the 3 TC of previous box (this part is the decrease but is balanced out by the customary increase at the end of the row - constant number of boxes per row) and carry on.
And so I repeated rows 91 & 92 (with a constant number of 90 boxes per row) until I had worked 125 rows and reached my desired length. At which point I had a trapezoid with a 90-box "live" row between parallel sides of 125 and 35 boxes respectively, and a bottom edge (a leg of that original isosceles triangle) of 90 boxes.
Having reached my desired length, I'm now working decreases (without increases) on each row. In theory I will eventually get to the point where I have a one-box row. And on that glorious day I will start the edging.
True decrease row: Slip stitch across the 3 TC of previous box, work as before until last box of previous row, join with slip stitch & turn (skipping making a new box along the edge of that last box from the previous row).

I know it looks like I'm almost finished but I've done the math. At two boxes per minute (plus interruptions and color changes) and 435 boxes remaining, I'll need to spend 4+ more hours before I even start the edging. This throw and I have been too hot and heavy and I've got friends with milestone birthdays and sweater weather and Rhinebeck(!) coming so, yeah, I think this one might have to rest a little while I give some other projects some love.
[ETA: correct hook size]
This is beautiful!
ReplyDeleteYour blankie is mesmerizingly gorgeous! Go girl! You have more patience than 99% of the world.
ReplyDeleteoh, thanks for the details! it's really lovely. and it is almost finished--look at all you've done!
ReplyDeleteI love it!!!
ReplyDeleteI'm currently working on a baby afghan with this stitch. Are the sides supposed to be even? One side is exactly twice the length of the other side. Is this normal?
ReplyDeleteTee
With this stitch in correct gauge you can make rectangles of whichever ratio pleases you. But while you'll end up with a rectangle, opposite sides being equal in length, you work thru a couple other shapes first: triangle (isosceles) and trapezoid (NOT isosceles). I'm betting you're in the trapezoid phase. Here's a breakdown of the shape process:
DeleteWhile you're working, you start by forming a triangle with sides A, B & C. C is the diagonal, the live edge you're working on, and A&B are growing at a constant rate and are the same length (plus or minus a row). You carry on in this way until you reach the desired width at which point side A stops increasing and side D is introduced. So B & D are opposite sides and will be different lengths until the very end. Once you reach the desired length you'll start decreasing at both ends of the diagonal (introducing side E which is opposite A), you'll notice that the length of B stays constant while D continues to increase (E is also increasing while A remains constant). C will be decreasing until it ceases to exist and B&D will be equal, as will A&E.
Hope that helps!